Adding email addresses manually to your email list can be a pain. If your daycare uses Mailchimp, you can easily add your contacts to your email marketing campaigns using the “Import Contacts” feature.
Steps for Importing Contacts into Mailchimp:
- If you don’t have a spreadsheet set up already, you’ll want to use Excel or Google Sheets to organize your contact names and email addresses.
- Save the spreadsheet in CSV format.
- Login to Mailchimp.
- Open the Audience tab.
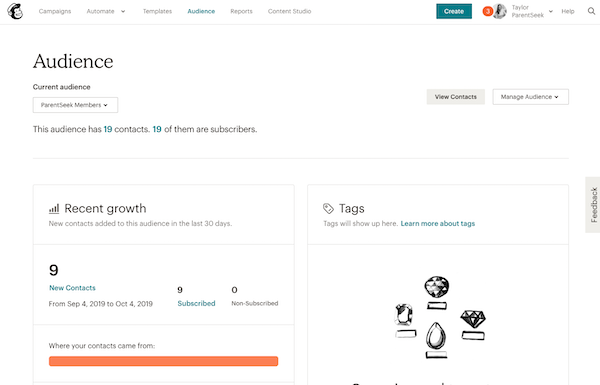
- If you have more than one audience, click the dropdown arrow to choose the one that you want to add contacts to.
- In the upper right corner, click the dropdown under Manage Audience. Click Import contacts.
- Choose CSV or tab-delimited text file. You’ll want to use the same spreadsheet setup each time so that you can use the settings from your last import to make it easier.
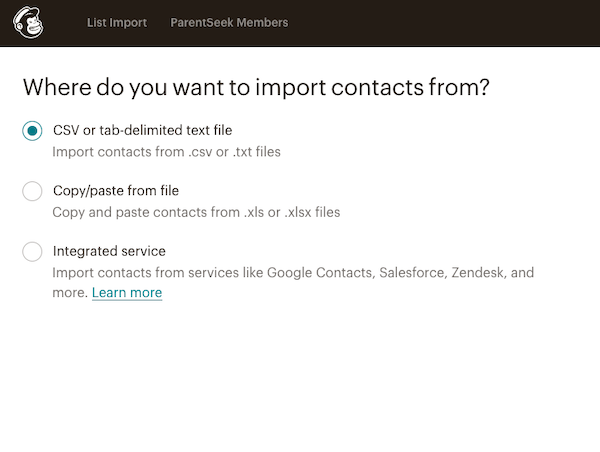
- Click the Continue To Setup button in the lower left corner.
- Click Browse to upload the CSV file from your computer.
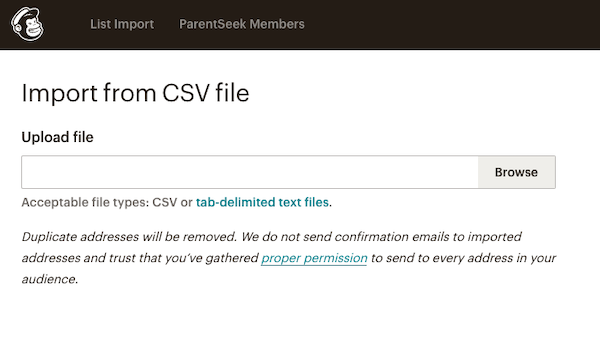
- Click Continue To Match.
- Match the columns in your import file to the fields in your Mailchimp audience. Some might match automatically.
- Click Edit if you want to choose a different field type from the drop-down menu. Choose Create a new field if you want to add one.
- All columns must be matched or skipped to complete your import. When you finish, a message will appear indicating that all columns are matched.
- Click the Continue To Organize button.
- If you want to organize your contacts with labels, you can tag them by clicking the plus icon in the Tag all contacts section.
- If you want to sort your subscribed contacts based on interests and preferences, you can add groups. Under the Add contacts to groups section, check the boxes next to each group that applies.
- In the Choose status of these contacts section, click the drop-down menu to choose the type of contacts you’re about to import: subscribed, unsubscribed, non-subscribed or cleaned. To learn more about the different statuses, click here.
- If you want to update your existing contacts with the information from your import, check the Update existing contacts box. If your import doesn’t contain any existing contacts, you can leave the box unchecked.
- Click Continue To Review to double-check your import settings.
- When you’re ready, click Import.