If your daycare center is using Mailchimp for email marketing, you’ll definitely want to take advantage of its automation feature. Using this feature will help ensure your emails go to the right contacts at the right time, without the stress that comes with trying to manage it yourself. Automation will not only save you a ton of time, but it keeps a conversation going between you and your potential customers, no matter how many there are.
Nurturing a relationship with automated emails helps you show parents that they matter to your daycare and in turn, improve your clientele loyalty. In addition, automation enhances your center’s brand with a personal touch and targets new parents with personalized triggers that you set up.
Here are the steps to create an automation in Mailchimp:
Create an Automation
- Log into your daycare’s Mailchimp account.
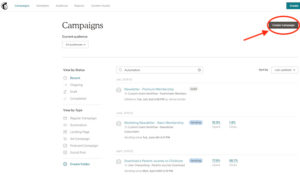
- Click on the Campaigns tab in the upper left hand corner.
- Click the Create Campaign button in the right hand corner.
- Click Email.
- Click Automated.
- Choose an automation category tab from those available (this depends on what plan you have). If you can’t find what you’re looking for, you can choose Custom to design an automated campaign yourself.
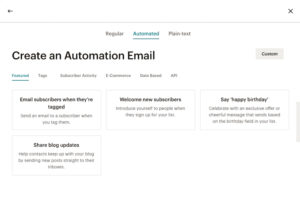
- Choose Single Email or Email Series.
- Enter a Campaign Name, and choose your audience in the drop-down menu.
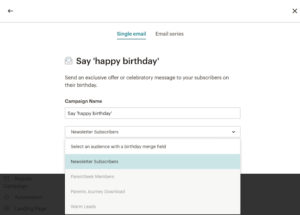
- Click Begin.
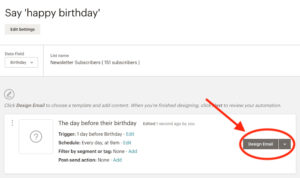
Edit and Design Your Email
- Click Design Email.
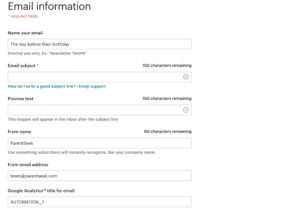
- Input all email information, including the name of your email, email subject, preview text, from name, from email address, and your Google Analytics title for the email.
- Click Next.
- Choose an email template that best fits your envisioned content layout.
- Design and style your email.
- Always test your emails before sending them using the Preview and Test tab in the upper right hand corner.
Confirm and Send
- Click Edit Settings under Workflow configuration to change any overall workflow settings.
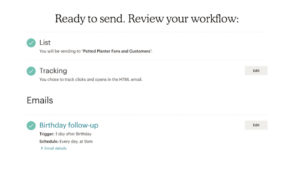
- Review your workflow, and click “Resolve” or “Edit” to make any last-minute changes to your automation.
- Click “Start Sending” to begin sending your automation!
- You can manually add or remove subscribers to an automation.